What is Surya Namaskar?
Surya Namaskar is a traditional yoga sequence of 12 postures performed in a continuous flow, each posture timed to either an inhalation or an exhalation. It is usually practised facing east in the early morning, and one full round is made up of two half-rounds, leading with the right leg and then the left.
Different schools teach slightly different versions. Some use a plank in step 5, others a mountain pose; some hold the breath out in step 6. The version below is common across Indian traditions and is a safe starting point. If your teacher uses another variation, follow them: what matters most is that every movement rides on a breath.
The 12 steps of Surya Namaskar with breathing
Stand at the front of your mat with your feet together or hip-width apart. Take a few quiet breaths before you begin. Each description below is for the half-round leading with the right leg.
Step 1: Prayer pose
ExhalePranamasana
Stand tall and bring your palms together at the centre of the chest. Relax the shoulders and let the weight settle evenly through both feet.
Step 2: Raised arms pose
InhaleHasta Uttanasana
Lift the arms up and slightly back, lengthening the whole front of the body. Keep the hips over the heels and squeeze the buttocks lightly to protect the lower back. The backbend is small.
Step 3: Standing forward bend
ExhaleHasta Padasana
Fold forward from the hips, bringing the hands beside the feet. Bend your knees as much as you need to: flat palms matter less than a long spine.
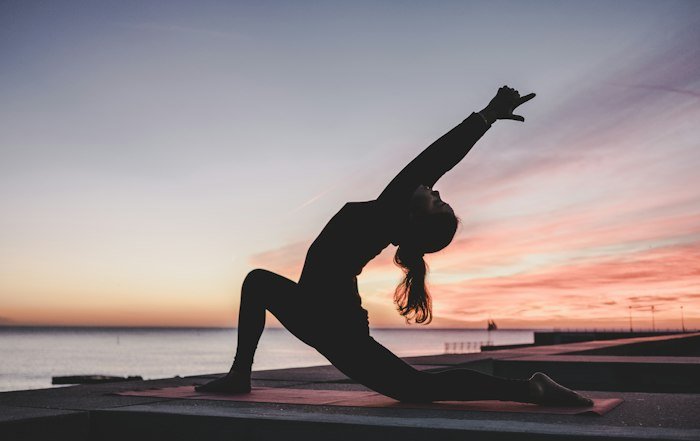
Step 4: Low lunge
InhaleAshwa Sanchalanasana
Step the right leg back and lower the right knee to the mat. The left knee stays over the left ankle. Lift the chest and look slightly forward.
Step 5: Plank
Inhale, or hold the breath in brieflyDandasana
Step the left leg back to meet the right so the body forms one straight line from head to heels. Hands under the shoulders, belly lightly drawn in.
Beginners can lower both knees to the mat here.
Step 6: Eight-limbed salute
ExhaleAshtanga Namaskara
Lower the knees, then the chest and chin to the mat, keeping the hips slightly raised. Eight points touch the floor: two feet, two knees, two hands, the chest and the chin.
Step 7: Cobra
InhaleBhujangasana
Slide forward and lift the chest, keeping the elbows bent and close to the body. The lift comes from the upper back, not from pushing hard with the arms.
Step 8: Mountain pose
ExhaleParvatasana (downward dog)
Tuck the toes and lift the hips up and back into an inverted V. Press the hands into the mat and let the head hang between the arms. Heels do not need to touch the floor.
Step 9: Low lunge
InhaleAshwa Sanchalanasana
Step the right foot forward between the hands and lower the left knee. Lift the chest.
If the foot does not reach, lift it forward with your hand. Nobody is watching.
Step 10: Standing forward bend
ExhaleHasta Padasana
Step the left foot forward to meet the right and fold over the legs, knees bent as needed.
Step 11: Raised arms pose
InhaleHasta Uttanasana
Roll up slowly or come up with a flat back, reaching the arms overhead.
Step 12: Standing pose
ExhaleTadasana to Pranamasana
Lower the arms and return to standing with palms together at the chest. Pause for a breath before starting the second half, leading with the left leg in steps 4 and 9.
Surya Namaskar at a glance: pose, breath, modification and caution
| Pose | Breath | Beginner modification | Take care if… |
|---|---|---|---|
| 1. Pranamasana | Exhale | Feet hip-width apart for balance | — |
| 2. Hasta Uttanasana | Inhale | Arms straight up, no backbend | Lower back pain: keep it upright |
| 3. Hasta Padasana | Exhale | Bend the knees generously | High blood pressure or glaucoma: keep the head above the heart |
| 4. Ashwa Sanchalanasana | Inhale | Hands on blocks or the front thigh | Knee pain: pad the back knee |
| 5. Dandasana (plank) | Inhale / hold | Knees down on the mat | Wrist or shoulder injury |
| 6. Ashtanga Namaskara | Exhale | Lower to the belly fully | Recent abdominal surgery |
| 7. Bhujangasana | Inhale | Low cobra, forearms on the floor | Lower back pain: stay low |
| 8. Parvatasana | Exhale | Knees bent, heels lifted | High blood pressure: keep it short |
| 9. Ashwa Sanchalanasana | Inhale | Help the foot forward with your hand | Knee pain: pad the back knee |
| 10. Hasta Padasana | Exhale | Bend the knees generously | Dizziness: rise slowly |
| 11. Hasta Uttanasana | Inhale | Arms straight up, no backbend | Lower back pain: keep it upright |
| 12. Pranamasana | Exhale | Pause for a full breath | — |
How many rounds should a beginner do?
Start with two to four slow rounds, taking three or four natural breaths in standing between rounds. Keep that for a week or two. When the sequence feels familiar and your breath stays even, add one or two rounds at a time.
Resist the urge to speed up. A fast round turns the practice into cardio and makes it much easier to strain the wrists, shoulders and lower back. A slow round, where each breath is long enough to arrive fully in the pose, is harder than it looks and far more useful. After your last round, lie down on your back in Shavasana for a minute or two and let the breath settle.
Benefits of Surya Namaskar, including flexibility
Because the sequence alternates forward bends with gentle backbends and asks you to support your body weight, students who practise regularly often notice:
- Easier forward bending. The hamstrings and calves lengthen gradually through steps 3, 8 and 10. This is where most people first notice a change in flexibility, usually within a few weeks of steady practice.
- A more mobile spine. Moving between rounding and arching with the breath keeps the back supple, which many desk workers find especially welcome.
- Upper-body strength. Plank, the eight-limbed salute and cobra ask the arms, shoulders and core to work in a controlled way.
- A steadier breath and a calmer mind. Matching movement to breath naturally slows and deepens breathing, and many students describe feeling both energised and settled afterwards.
- A complete short practice. On busy days a few rounds of Surya Namaskar can stand in for a longer session.
Flexibility builds slowly and differently for every body. Comparing your forward bend with someone else's, or with a photograph, is not useful. Compare it with your own from last month.
When and where to practise Surya Namaskar
Traditionally, Surya Namaskar is practised at sunrise, facing east, on an empty stomach. Early morning suits most people: the air is cool, the day has not started pulling at you, and the sequence wakes the body gently. If mornings are impossible, a late afternoon or early evening practice works too, as long as it is at least two to three hours after a main meal.
You need a non-slip mat and enough space to stretch your arms overhead and step back. A cotton rug or folded blanket under the knees helps in the lunges. If you work long hours at a desk, pairing a few rounds in the morning with our desk yoga stretches during the day is a simple routine that covers a lot of ground.
When you are ready to learn with guidance, our morning and evening batches in Baner teach Surya Namaskar step by step, and our teachers can suggest a version that suits your body. You can also check current batch times on the class schedule.